Feeds:
Posts
Comments

Green Tea Craze

Hope it has been a great start for the new year for all of u. I have looked forward to year 2012 and am glad that it has finally come and I am now happily embarking on my Project Life 2012 and finishing up my Dec Daily 2011. I hope to share about these 2 projects on the blog soon.

Recently, I have been on some ‘green tea’ craze.

Through the past months, I managed to whip up quite a few green tea desserts.

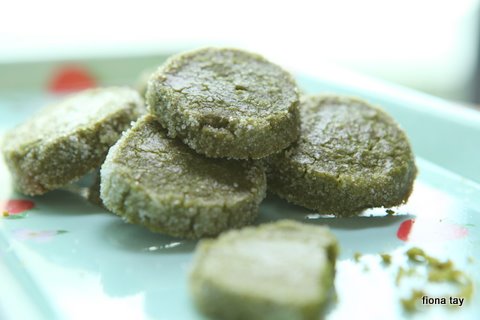
1. Green Tea Sable Cookies

I have never tried green tea cookies before (only green peas ones during Chinese New Year) and I thought this green tea cookies tasted really refreshing with a strong green tea aroma.

If you are keen to try, recipe is from “Okashi” by Keiko.

2. Green Tea Light Pound Cake

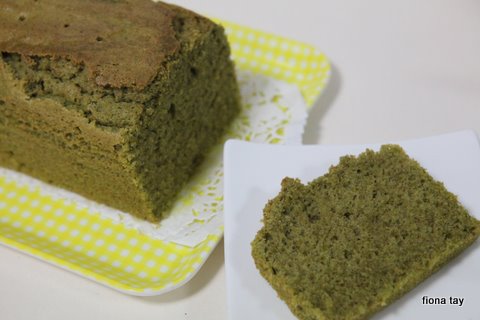
I came across this recipe by chance. Was reading some craft blogs and came across ‘cotton and cloud’ which is mainly a knitting blog and she posted this interesting green tea light pound cake recipe. I am not a butter fan and when I saw her non-butter and healthy version of pound cake, I knew I have to make this cake soon.

As the blog author has mentioned, this cake was light. It pairs well with some berries or jam.
For your easier reference, I post her recipe here:
Ingredients:
3 medium eggs
100g cane sugar
140 g sunflower oil
40 g soya milk
180 g self-raising flour
2 tsp maccha powder

Equipment:
Cake tin (the blog author used a cake tin 20 cm length, (12.5 cm width & 9 cm depth))


Preparation:
a. Turn on and pre-heat the oven to 180C.
b. Line the cake pan with grease proof paper
c. Sift the flour and maccha mixture once.
Step 1: Mix the eggs and sugar in a large bowl. Using an electric mixer, whisk for 10 min until white and fluffy.
Step 2: In a small jug, mix the sunflower oil and soya milk using a spoon so that you get a nice emulsion.
Step 3: Very slowly drizzle the oil and soya milk mixture to the batter made in step 1. If possible keep on whisking (if not, add a little, then mix – repeat this process).
Step 4: When you get a nice fluffy even mixture of eggs, sugar, oil and soya milk (wet ingredient), stop mixing. Sift the flour and maccha powder (dry ingredient) into the batter. Carefully mix using a scraper not to burst any air bubbles.
Step 5: When you have mixed the dry and the wet ingredients so that there are no powder to be seen in the mixture, pour the mixture into the cake tin.
Step 6: Even out the surface by lightly tapping the bottom of the cake.
Step 7: Bake at 180C for the first 8 min then reduce the temperature to 170C and bake for further 25-30 min or until the skewer comes out with small crumbs of cake (if it doesn’t then it is definitely cooked so take it out of the oven quickly to prevent it from drying)

3.Green Tea Chiffon Cake


Once again, recipe is from ‘Okashi’.


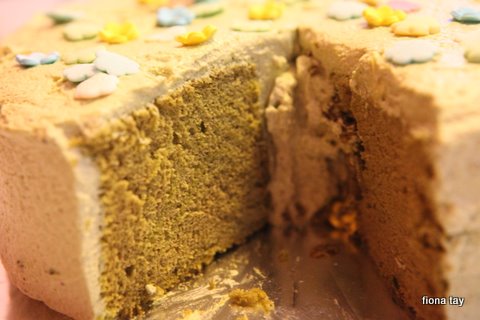
Do give this a try and make sure you also do the green tea cream frosting. And use a top grade green tea powder. You will be rewarded using better green tea powder.

I am not a cream lover for sure but I really love this cake with the cream. I have used what my hubby would usually not prefer, which is the non-diary whipped cream. But both he and Zachary love this cake a lot with the cream frosting.  Likewise for my boss who is a big time butter lover. As for me, I love this chiffon so much that I baked the chiffon thrice over 2 months period.

I used this cake for a mock up for Zachary’s birthday cake. He really love these ‘sheep’ cartoon characters a lot J And though it was a mock up, I lit up candles for him and he had fun time singing birthday songs and blowing off candles repeatedly (for countless times). Haha…

We also ate the cake with some azuki beans. Nice combination.

4. Green Tea Pudding


This is again recipe from ‘Okashi’.
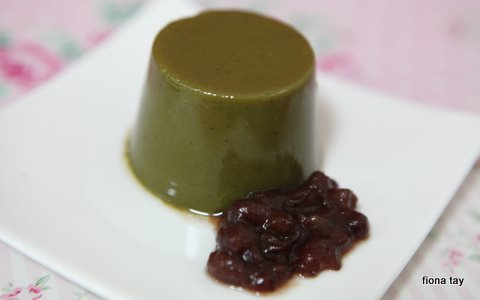

Texture was nice but both me and hubby thought the pudding was bit too bitter for our liking. I am not sure why; maybe the syrup I used was not sweet enough? Needless to say, Zachary replied me ‘ok already’ after the first bite. I guess I will try to use honey instead for my next trial.

Do share with me if you come across any other fabulous green tea related recipes.
Recent Sewing Projects

Lately, I have made these small craft/ sewing projects as gifts for my loved ones.

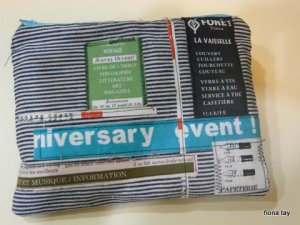
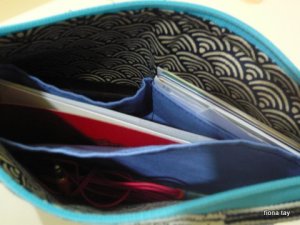
First is this travel pouch made for my hubby who travels very frequently for work. I would say that this is more or less a custom-made pouch for him. I asked for his preferred dimension and also made sure that his passport would definitely fit in. Also, made some compartments as requested by him. One big divider in middle together and 2 pockets for cards.

The fabrics used are all from my Taiwan trip purchases. All are suzuko’s fabrics except for the navy strip fabrics. Quite easy and fast pouch to do although I did have a bit difficulty sewing the zipper with the thick navy strip fabrics. My needle actually broke while I try to force through over a very thick section.

And the next patchwork project I did was these 2 log cabin coasters I did for my galfren’s house warming. One for her and one for her husband. She loved pink a lot, so naturally pink one for her. I was quite happy with the patchwork considering that this is my first log cabin patchwork.


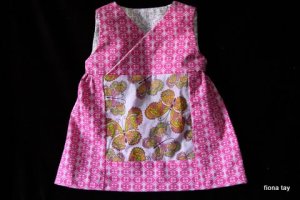
And lastly, a birthday dress made for my colleague’s new born gal. Pattern by Anna Maria Horner. Both fabric bought from spotlight. I like the combination of the 2 fabric. It was a fast and simple dress to make. The baby version of dress is just so lovely. It is a pity that I don’t have a little princess of my own to sew for.

My hubby had very kindly changed the tv channels subscription last month after seeing me so happily engrossed in watching the masterchef Australia. He subscribed for more cooking channels for me which he has now slowly started regretting doing so since it is at expense of not being able to watch his favorite sports channels at times.

I have learnt and gained more exposure by watching some of these cooking shows. And I have also tried cooking what I learnt from these shows. These are some that I came out with during the recent weeks.

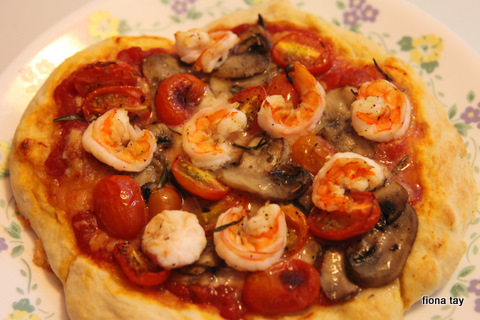
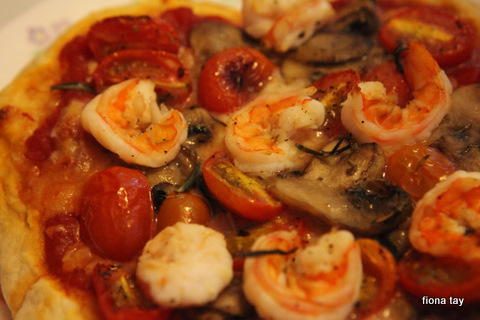
1. Pizza – learnt from masterchef Australia


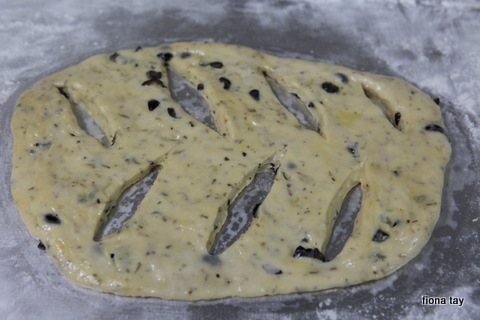
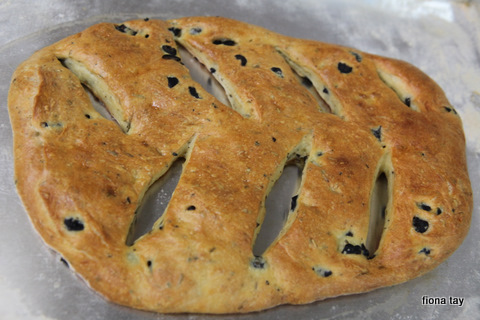
2. Fougasse – learnt from Laura Calder

My first time in bread making. Dear Zachary was very amazed by those holes in the bread and was using them to play ‘peek a boo’.


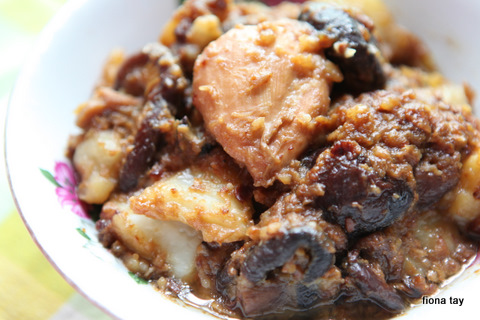
3. Chicken Stew With Fermented Soya Bean – learnt from chef Wan

My first time using the fermented soy bean paste which really adds lots of unique taste to peranakan dishes.

This is really a very aromatic dish. My only regret was not watching the pot diligently. The liquid which was a lot at start was reduced to quite minimal and hence not as much yummy sauce as I would like to have.

I have a colleague who only recently realized that she is actually a nyona. She has asked for this recipe from me and told me that she hopes to learn how to cook peranakan dishes. So, am attaching here the recipe to share with all.

Recipe from chef Wan:

Ingredients

1 kg / 2 pounds / 3 oz Chicken, cleaned and cut into pieces
3/4 cup / 6 fl oz Vegetable Oil
30 Shallots (Red Onion), well pounded
15 Garlic cloves, peeled and well pounded
1/4 cup / 1 oz fermented Soy Bean Paste (Taucu or Tao-cheo), pounded
2 Tbsp / 1 fl oz Light Soy Sauce (Salty Soy Sauce, Kicap Cair)
2 tsp Dark Soy Sauce (Kicap Pekat)
2 cm / 1 inch Ginger, sliced
4 Cloves
2 Star Anise
10 dried Black Shitake Mushrooms, soaked in hot water until soft
3 Potatoes, peeled and quartered
3 cups / 24 fl oz water
2 Red Chilies sliced
2 Green Chilies sliced
2 Tbsp / 1 fl oz sugar
1 tsp grounded Pepper
Coriander (Cilantro, Chinese Parsley or Ketumbar) for garnish

Method

Heat oil in casserole dish, sauté the Shallots, Garlic till fragrant.

Add in Star Anise, Cloves and Ginger, and mix them well.

Add in Chicken and mix them well.

Add in Dark Soy Sauce, Light Soy Sauce, and fermented Soy Bean Paste (Taucu or Tao-cheo).

Add in water, Mushrooms, Potatoes and Coriander Leaves; add sugar and pepper to taste.

Mix well and stew chicken for half an hour.

Add in Red and Green Chilies, sugar and pepper and once again bring to boil.

Lower the heat and simmer for a further 20-25 minutes or till Chicken is tender and gravy is thick.

Garnish with Coriander Leaves and serve.

Gifts for the teachers

Oops, one post that I forgot to post earlier. Really late for this one. It’s about the presents I made for zachary’s teachers.

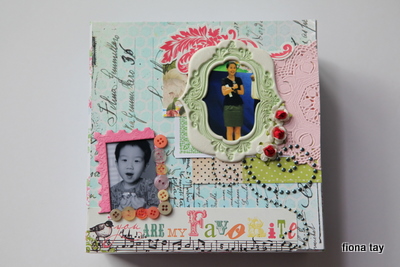
To show our great appreciation to the care and love given by Zachary’s teachers at the Little Skool House, I did an altered gift box for each of them. Managed to capture them in some photos and used them for these personalised gift boxes.

For teacher Rina:

These beautiful boxes are bought from Daiso. I decorated only the cover of these boxes. Simple scrapbook layout for the covers due to lack of time to make them. Have used the latest mistable papers series from Pink Paislee.

For Ms Yang:

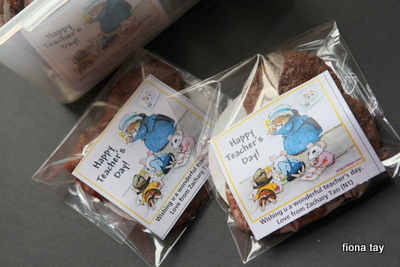
And for the rest of the teachers, some home baked cherries chocolate cookies…

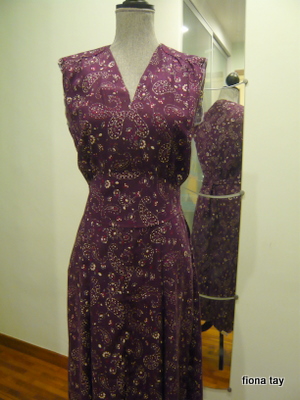
I finally completed my Swing Dress early last month after much struggles and worries. For those who have not come across this dress pattern, it is a 1940s swing dress pattern inspired by an original Hollywood design, circa 1942. You can purchase the pattern from ‘sense and sensibility’.

Many obstacles faced for making of this dress. I first bought the e-pattern which my printer simply failed to print to the right size. So, I have no choice but to top up and buy the paper one and wait patiently for it to be sent over.

But when the paper one arrived, I really scratched my head hard when trying to digest the part on the shoulder and facing sewing. But luckily, I remembered there’s a previous sew-along of the Swing Dress by Casey. Her sew-along posts have been extremely helpful. But, I still take awhile to understand the shoulder facing part and ripped off once to fully able get what Casey was trying to illustrate. After the shoulder, the rest is quite a breeze to sew through. And I tried Casey’s vintage method of installing the normal (instead of invisible) zipper. I loved this beautiful method though is a bit for work.

I love how the dress looks. But would have loved it even more if the fitting was better. I chose a size which fits my bust and waist almost exactly and adjust for a bigger hip. However, it still turn up that the top was too big for me. I should have shorten the upper bodice a little. And if you are going to attempt this dress, do make sure you heed Casey’s advice to adjust for the set in sleeve as I chose to skip that and true enough, as like what Casey cautioned, the ease for the sleeve was far too much and there’s unsightly puckering for mine.

My husband however think that this pattern looks too old on me and the fabric was also too old fashioned. But I told him, it’s supposed to look vintage. Ha ha. All in all, I think it’s a beautiful pattern from ‘sense and sensibility’ but I think that instruction and illustration could really be improved on. I would definitely not recommend this pattern to a beginner given this fact. But should you choose to attempt, read Casey’s sew along posts and it will be good to do up a muslin to check the fitting for this pattern. Hope you enjoyed my review of this ‘Swing Dress’ pattern.

And lastly, also to share with you the Japanese Linen pants I made for my son using the same linen that I made for my blouse few months back. Both patterns are from Japanese magazine (Cucito if I didn’t recall wrongly).

This was the first time I made something of same fabric for both of us and I thought this was really cool as it is not easy to find a feminine top for mummy of same print as her son’s clothes. Thats the advantage of learning to sew! I am in process of making a dress with a parachute print which I intend to use it to make a top for zachary. Maybe for chinese new year next year.

Photomarathon 2011

Hi everyone, must apologize for the long absence from this blog. Been occupied by daily chores, exam studying and a pre-wedding shoot last month.

Like to share with you here an photo taking event I went to last month on the 10th. It was the 9th Canon Photo Marathon Singapore. This was my first time participation and was glad to find a comrade to go with. The whole event took around 12 hours with 3 themes and participants were to take and submit photographs within the stipulated time periods. The three themes are: ‘Eat’, ‘Circle’, and ‘Imagine’. Submissions were judged according to the following criteria:

– Relevance to theme
– Creativity in theme interpretation
– Use of colours and light/shadows
– Composition of photograph

This year, the event had once again made a new record number of 2078 participants.

You can view the winning photos via this link.

And my submissions are as follows (straight from camera with no editing):

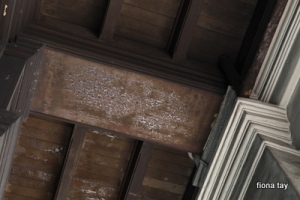
Building structures ‘eaten’ by nature

Concentric ‘circle’ patterns of the circular lanterns

‘Imagine’ breaking out from the bars (model: my comrade Stephen)

Was really exhausted from the whole day of walking, taking photographs and carrying the big bag of photography gears around. But was an inspiring day for me!

Some snapshots of me taken by Stephen:


I completed 2 sewing projects recently.

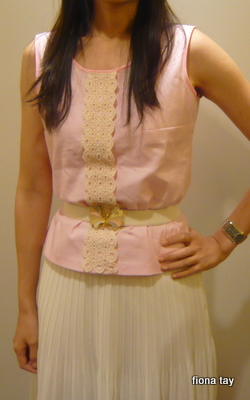
First is the sorbetto top. You can download the free pattern and the wonderfully clear instructions from sarai’s blog. The blog has recently also shared on how to do variation for this top and Mena  has this 7 days sorbetto with 7 versions of this top. Amazing! Am definitely going to try another such variation of this top with all these inspirations.

Pardon me for the wrinkled top:

This is an easy top to make and to save time, I bought bias tape for the arm and collar binding. And to add details to the box pleat on this top, I hand sew a lace strip on. The fabric used was broad cloth bought from spotlight.

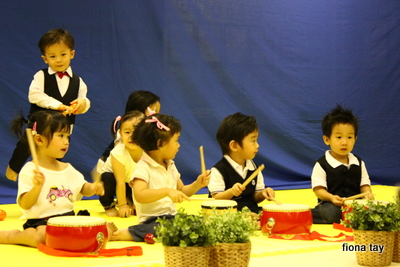
The second one is the vest I made for Zachary’s recent concert. The pattern is from Burda style 9990. Used black linen with gingham cotton for the lining. Quite easy one to do except I had some problem with the back facing and I could not avoid some puckering while turning over the facing.


Some recipes to share

I am so so behind in my posting lately. Lots of drafted posts but just no energy to log on when home especially so when I am chasing after the masterchef australia and desperate housewives serials. Plus my laptop battery is spoilt. Ok, no further excuses and please let me share with you some food I made the past month.

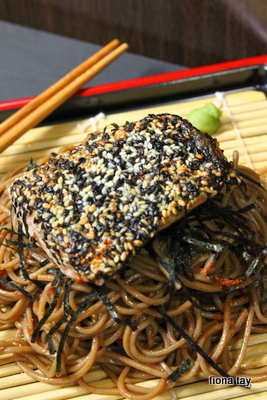
The first one is this sesame crusted salmon with honey soba. Found this recipe from a local food blogger. Check out her blog for all the wonderful recipes she shared. Her yam cheesecake was been featured on newspaper too.

I really love the cold honey soba. Sweet and tasty. Sesame crusted salmon was also a combination that I tried for the first time; not bad at all.

Recipe extracted from maameemoomoo blog:

Sesame Crusted Salmon with Cold Honey Soba
(serves 4 small eaters)
300g soba
1 tsp sea salt
3 – 4 x 150g salmon fillet with skin on
1 tbsp white sesame seed
1 tbsp black sesame seed

(A)
5 tbsp soy with dried bonito extract
3/4 tbsp extra virgin olive oil
3/4 tbsp sesame oil
2 1/2 tbsp honey

To serve
fried nori, optional
wasabi, optional
nanami togarashi, optional

Method
1. Cook the noodles in a large saucepan of boiling water for 3-4 minutes or until softened. Drain, return to the saucepan with ingredient (A) and toss to coat.
2. Refrigerate noodles for at least an hour.
3. 15 minutes before meal, marinate salmon with sea salt for 10 minutes.
4. Place the sesame seeds on a tray and mix to combine. Press salmon, skin-side down, into the sesame seeds to coat.
5. Heat a large non stick frying pan over medium heat and cook the salmon, skin-side down for 3 minutes or so. Turn and cook for a further 2 minutes or until cooked to your liking.
6. Top noodles with fried nori, salmon and scallions.
7. Serve with wasabi and nanami togarashi immediately.

Note : if you dislike your noodles cold, just skip the refrigerating bit and you’ll have warm noodles with your salmon.

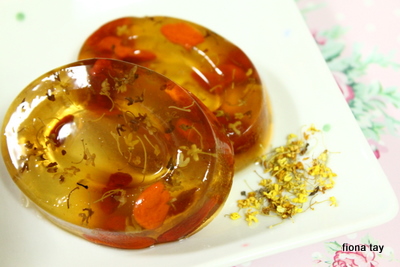
And the second recipe to share here is the osmanthus jelly. I have been in love with this dessert when I tried it in Hong Kong this time. So since I came back, I started finding out how to make it. It is a truly very refreshing dessert and has very nice osmanthus fragrance.

Recipe:
10g Konnyaku Jelly Powder (I used Red man brand)
210g sugar (per  instruction of the powder packet)
950ml Water (per  instruction of the powder packet)
2-3 teaspoons dried osmanthus flowers
Wolfberry (optional)
Steps:

  1. Add osmanthus flowers to water. Using medium heat, wait for it to boil.
  2. Combine 210g sugar and 10g Konnyaku Jelly powder in separate bowl. Leave aside.
  3. When water is boiling, switch to a lower heat and drain approximately half of the osmanthus flowers (Do not discard, leave aside).
  4. Add in blended sugar and jelly powder gradually into the water and stir constantly to prevent lumps.
  5. When the entire portion of blended sugar and jelly powder dissolved, keep stirring till water boils again.
  6. Remove from heat and add in the flowers (that was removed in step 3 earlier on) and stir for a while.
  7. Put some wolfberry at the base of jelly mould if you like. (remember to soak them in water for around 20 minutes before use).
  8. Pour the mixture into mould.
  9. Wait for it to cool down a little before transferring into fridge.

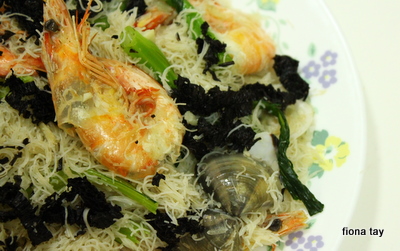
And lastly, Heng Hwa Bee Hoon. I got the recipe from ‘Food and Travel Magazine’ may 11 issue. The extremely thin bee hoon and dried seaweed shreds are bought from ‘Pu tien’. I really love this dish although standard of which is still far behind that of ‘Pu tien’. If you are cooking up this, be mindful how much liquid these bee hoon will soak up.

Two weeks ago, I finally got the chance to meet up with some of the Big Shot contestants (Ferry, Daniel and Liew). We were all ready for the filming of the trailer for Big Shot Season 2 at the Singapore Flyer.

We had great fun together. And Ferry helped me took some photos while we were waiting for our turns.

And also, not forgetting to take the chance to take a picture together with the ESPN host, Kui Jien.

And shot of Singapore city scape from the highest point of flyer.

Lastly, not to forget to remind all that the Big Shot Season 2 is coming. Do give it a try and you stand a chance to win $20,000. Great learning opportunity and exposure! You never know if you are the next ‘Big Shot’!!

Last photo to share here is a cute little cat photo taken after the filming that day:

Poodle Scallop Skirt

The first time I came across Chie’s blog was through grosgrain blog when grosgrain was doing this free tutorials series for a whole month. Her scallop skirt is just so sweet and cute that I decided instantly to do it when I first saw it.

photo extracted from chie’s blog

The instruction for this skirt given by Chie was very straight forward. However, if you have not done an invisible zip before, you may probably need some guidance elsewhere. This is my first time doing something with scallop design and this was made easy by chie’s clear instruction.

The fabric I used was bought from Chinatown at a discounted price of SGD$4 per yard. While I was cutting up this pattern, I remembered a vintage green flannel skirt with poodle I saw before at a vintage store. The price was over a hundred and I didn’t find it worth getting. And so, I took this opportunity to create my own vintage poodle skirt.

The poodle and strap embellishment was hand sew on. I really love this cute lovely skirt. Thanks Chie and grosgrain for sharing this free pattern. Have a look at chie’s blog; she’s a very talented young mother with her own line of clothings and also go to grosgrain blog for endless inspirations and wonderful sharings. The pattern for this skirt can be found in grosgrain blog which also has many other tutorials for you to try on. (I will be sharing soon on the sorbetto top – which you can also find the free tutorial there)

Also, must thanks my friend, Jas, for helping me take the photos of me wearing the skirt.